FOB Battle Report, Elixheim: Overview
Wargamers Prayer: Dear Lord, You give us games that allow us to enjoy each other's company, share in fellowship, experience joy in play, learn from our past and memorialize those who came before us for the sacrifices they made. May you be with us in our games and learn about You as we play. Let's be ferocious opponents on the "battlefield" but even better friends in life. In Your Son Jesus name I pray. Amen.
1. The Story
1704 was a very successful year for the Grand Alliance (Britian, United Provences, Imperial Austria, and many German states). They had just defeated the French and Bavarians at Blenheim and Now Marlborough wants to go up the Moselle river to invade France itself. However, he needs the help of Imperial Austria to do this and they don't show up in time shutting the campaign down.
Marlborough now retreats his army to Flanders where he plans to push the French out of the Low Countries in what is now Belgium.
The French have built a line of defenses called the Lines of Brabant from Antwerp to Namur. These are not fortifications but strong positions with sunken roads, hedges, built up towns for defense that the French can quickly rush to if they are attacked.
So, here we find Marlborough on 17 July, 1705. He starts to march the army south and the French army (led by General Villeroi) is shadowing him. That evening, Marlborough takes a contingent of troops and turns them around to march north to a weak spot in the line near the village of Elixheim. Marlborough crosses the line and clears out the French piquets watching over it.
The French, however, have left a strong rear guard under General D'Alegre that marches to intercept Marlborough and push him back beyond the lines. This is where the two armies meet on the morning of 18 July 1705.
Historically, the results were a British and Dutch victory. The Allies caused about 5,000 French casualties, were now inside the lines, and had even captured General D'Alegre.
Marlborough had personally been involved in the cavalry charges during the battle and had almost become a casualty himself at one point when a Bavarian had come close enough to take a missing sword blow at him. One of Marlborough's aides took the man out but what if the blow had hit its mark?
This image below is from the Spanish Succession website

2. The Battlefield
British and Dutch are on the left. French and Bavarians are on the right.
 |
British and Dutch portion on the left side of the table.


The green beads represent that the infantry has first fire advantage.

The British and Dutch cavalry are to the right of the infantry in the open ready to thwart the French attack.

The French and Bavarians are on the right side of the field.

Their cavalry has to decide. Wait for the off board infantry to arrive on the 2nd French/Bavarian move card or advance to battle.

The infantry are off board waiting to join the fray.

3. The Armies
A. The British and Dutch Army
The Infantry
The British and Dutch together have 4 brigades of infantry. The red stat cards are British brigades. The orange stat card is Dutch.
Commander in Chief (CIC) John Churchill, 1st Duke of Marlborough

2nd Brigade leads the way under General Ferguson

Scots Fusilers
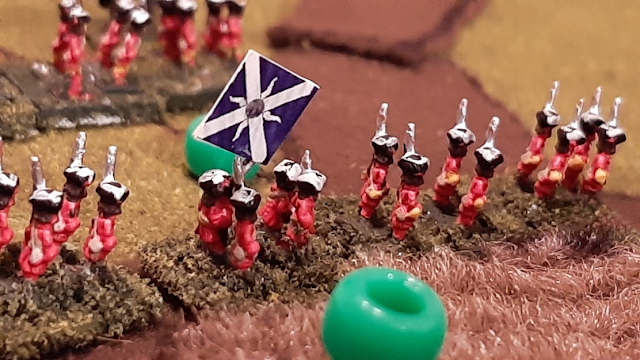
Earl of Bath's Regiment

Lord Douglas's Regiment of Foot

1st Brigade, General Rowe


Welch Fusilers (I love their banner!)


3rd Brigade, General Webb

Earl of Angus's Regiment of Foot

Royal Regiment of Ireland


4th Dutch Brigade , General Pallandt

Pallandt's Regiment

Van Goor's Regiment

Salisch's Regiment

The Cavalry
Their are 3 brigades of cavalry, two British and one Dutch.
5th Dutch Brigade, General Nassau La Leck

Ginkle's Regiment (yes, the flag is upside down. I'll fix after game).
Oranje-Friesland Regiment

Wurttemburg Regiment

6th Brigade, General Palmes


The Queen Dowager's Regiment

Lord Cavendish Regiment

7th Brigade, General Wood

1st Battalion, Earl of Plymouth Regiment (yes, it's identical to the 2nd Battalion)


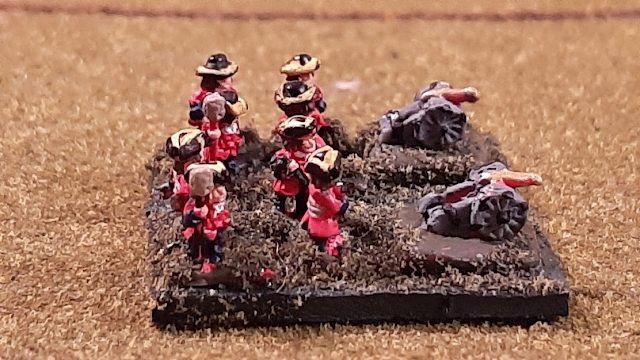
Artillery
Each of the 4 infantry brigades are each accompanied by a 3lb battery of battalion guns.
British Artillery

B. The French and Bavarian Army
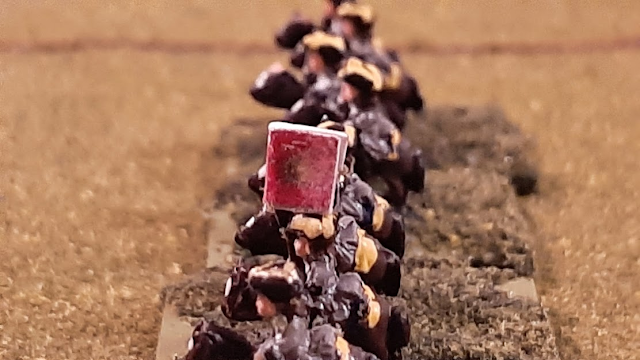
The Infantry
There are 3 regiments of French Infantry and 1 regiment of Bavarian. They start the game off table and don't enter until the 2nd French move card.
1ere Brigade, General Treccesson


2eme Brigade de Bavarie, General Mercy

Kurprinz Regiment


Tattenbach Regiment

3eme Brigade, General Breuil

1ere Battalion, Regiment d'Auxerrois


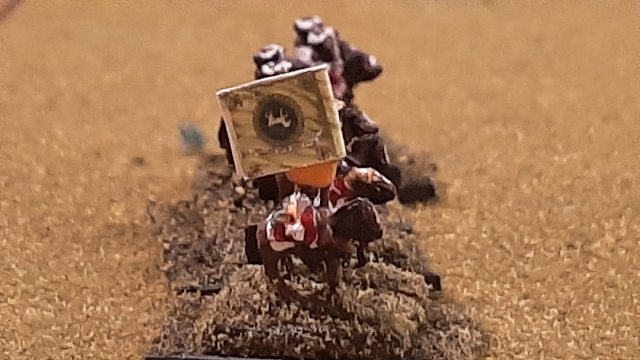
The Cavalry
There are 2 brigades of French cavalry. They are crack troops because in Black Powder they are Elite. However, I think that gives then to much might and would unbalance the game, so I lowered them to crack. Play might change my mind)There are also 2 brigades of Bavarian cavalry. The cuirassiers are very powerful cavalry with a lot of punch. The other brigade is also heavy cavalry.
5eme Brigade, General D'Arco


Wolfsramdorff Cuirassier Regiment


6eme Brigade, General Grignan

Regiment de Grignan

Regiment de Baume

7eme Brigade, General Merode-Westerloo (Spanish cavalry in French service)


8eme Regiment de Bavarie, General Wolfsramdorff
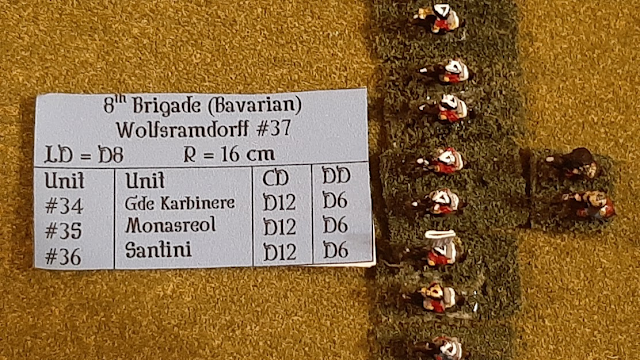
Garde Karbinere

Regiment de Monasreol


Artillery
Each of the 4 infantry brigades have an accompanying battery of 6lb battery of battalion guns.French Artillery

Bavarian Artillery

4. Terrain
Farm Fields and Hedges
The fields are class 1 terrain, same as open ground so they don't slow movement. The hedges are class II for cover when fired through by a unit that is not in contact with it to its front.
Roads
Roads are class I for movement and give the normal 1 1/2 move bonus to limbered and march column units on them. However, they are sunken roads and give a class II modifier to fire combat by units not in contact with the road to its front.
Town Sections/Buildings
The town sections are class II cover and a line of sight obstruction. Each section can hold a battalion of infantry.

Hills

Rivers
Rivers are class II terrain for movement. They give no cover.


Look forward to your report on the action
ReplyDeleteLook forward to your report on action
ReplyDeleteVery nicely done!
ReplyDelete